If you’re considering a sleek, modern flooring option for your commercial or residential space, polished concrete is likely on your radar. This durable and visually striking surface has grown increasingly popular in recent years, captivating homeowners and designers alike with its glossy, reflective finish.
But have you ever wondered exactly how this polished concrete look is achieved? The process involves several key steps, from the initial preparation of the concrete surface to the final sealing and protection. Understanding these steps can help you appreciate the expertise and care that goes into transforming a simple concrete floor into a true design centerpiece.
To apply polish concrete, the concrete surface must first be properly prepared by repairing any cracks or imperfections and thoroughly cleaning it. The concrete grinding process then systematically removes the top layer to expose the aggregate beneath, laying the foundation for the multi-step polishing sequence.
As specialized equipment with diamond-embedded pads refines the finish, a densifier solution enhances the concrete’s durability and shine. Finally, the floor is sealed and protected, locking in the desired level of gloss, whether matte, satin, or high-shine. Understanding this comprehensive application process helps one appreciate the skill and care required to create this stunning, reflective flooring option.
Table of Contents
How to Prepare the Concrete Surface for Polishing
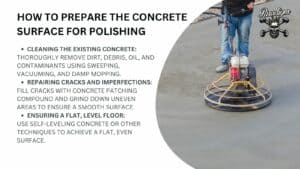
Before the concrete can be polished, the surface must be properly prepared by properly cleaning, repairing, and leveling it.
1. Cleaning the Existing Concrete
The first task is to thoroughly clean the concrete surface, removing any dirt, debris, oil, or other contaminants. This can be done through a combination of sweeping, vacuuming, and damp mopping. In some cases, chemical cleaners may be used to cut through stubborn grime.
2. Repairing Cracks and Imperfections
Next, any cracks, chips, or other surface imperfections must be repaired. This typically involves filling cracks with a concrete patching compound and grinding down high spots or uneven areas. Ensuring a smooth, level surface is key for the polishing process.
3. Ensuring a Flat, Level Floor
In addition to repairing imperfections, the concrete floor must be as flat and level as possible. Uneven areas can cause issues during polishing and result in an inconsistent final finish. This may require the use of self-leveling concrete or other floor preparation techniques.
What is the Process of Grinding Concrete?
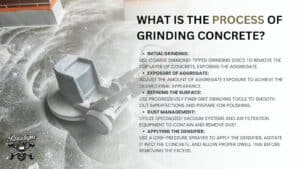
The process of grinding concrete involves initial grinding, exposure of aggregate, refining the surface, and dust management.
1. Initial Grinding
The first stage of grinding involves using coarse diamond-tipped grinding discs or pads to remove the top layer of the concrete surface systematically. This exposes the aggregate beneath, which will become the focal point of the polished concrete look.
The grinding equipment used is typically ride-on or walk-behind machines equipped with dust-containment systems to minimize airborne particles. Operators must carefully control the grinder’s speed and pressure to avoid gouging or uneven removal of the concrete.
2. Exposure of Aggregate
As the initial grinding progresses, the top “cream” layer of the concrete is gradually removed, revealing the aggregate – the small stones or pebbles embedded in the concrete mix. The amount of aggregate exposure can be adjusted to achieve the desired final appearance, from minimal to fully exposed.
3. Refining the Surface
Once the initial grinding is complete and the aggregate is exposed, the next step is to refine the surface using progressively finer grit grinding tools. This multi-pass process gradually smooths out any remaining imperfections or uneven areas, preparing the floor for polishing.
4. Dust Management
Concrete grinding generates a significant amount of fine dust that must be carefully contained and removed. Specialized vacuum systems and air filtration equipment are used throughout the grinding process to maintain a clean, healthy work environment.
How to Apply Concrete Densifier for Added Strength
Here is a step-by-step process of how to apply concrete densifier to add strength and durability to polished concrete floors:
Step 1: Prepare the Surface
Before applying the densifier, ensure the concrete surface is thoroughly cleaned and free of any dirt, debris, or other contaminants. This allows the densifier to penetrate deeply into the concrete.
Step 2: Apply the Densifier
Concrete densifiers are typically applied using a low-pressure sprayer or microfiber applicator. The product should be applied in a thin, even coat to ensure complete coverage of the surface. It’s important to follow the manufacturer’s instructions closely regarding application rates and dwell times.
Step 3: Agitate and Spread
After applying the densifier, it must be thoroughly worked into the concrete surface. This is typically done by spreading and agitating the material with a soft-bristle broom or microfiber pad, which helps drive the densifier deeper into the concrete pores.
Step 4: Allow Proper Dwell Time
The densifier must be allowed to dwell on the surface for the recommended duration, usually 15-30 minutes, to allow it to penetrate and react fully with the concrete.
Step 5: Remove Excess Material
Any excess densifier that has not been absorbed by the concrete should be removed using a squeegee or microfiber pad. This prevents a hazy or sticky residue from forming on the surface.
Step 6: Allow to Cure
After application, the densified concrete must be allowed to cure for the specified time, often 24-48 hours, before proceeding with the polishing process. This ensures the densifier has fully hardened the concrete.
Proper application of the concrete densifier is critical for maximizing the durability and shine of the final polished concrete floor. Following best practices will yield superior results.
How to Achieve the Desired Polished Finish
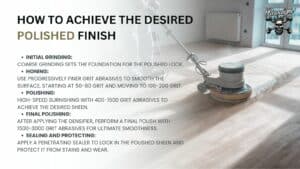
The polishing process is the series of steps that transform a prepared concrete surface into a smooth, reflective floor. The key is using the right equipment and techniques to refine the finish progressively.
Step 1: Initial Grinding
As discussed earlier, the initial grinding process uses coarse diamond abrasives to remove the top layer of the concrete and expose the aggregate. This lays the groundwork for the polishing steps.
Step 2: Honing
The next step is honing, which involves using progressively finer grit diamond abrasives to smooth out the surface. This might involve 3-4 different grit sizes, starting around 50-80 grit and moving up to 100-200 grit.
Step 3: Polishing
The polishing phase is where the floor starts to shine. Using high-speed burnishing equipment with very fine 400-1500 grit diamond abrasives, the concrete is polished to the desired level of sheen, whether a matte, satin, or high-gloss finish.
Step 4: Applying the Densifier
As mentioned earlier, a concrete densifier is applied to the polished surface to enhance the hardness, abrasion resistance, and overall durability of the floor.
Step 5: Final Polishing
After the densifier has cured, a final polishing pass with the highest grit abrasives (1500-3000 grit) is used to achieve the ultimate in smoothness and reflectivity.
Step 6: Sealing and Protecting
The final step is to apply a penetrating sealer or finish coat to lock in the polished sheen and protect the concrete from stains, abrasion, and other wear and tear.
What tools are used for polishing concrete?
The key tools used for polishing concrete include concrete grinders, honing and polishing pads, and high-speed burnishing equipment equipped with diamond abrasives. These specialized tools work in tandem to systematically grind, smooth, and refine the concrete surface, progressively transforming it into a smooth, reflective finish.
Can polished concrete be installed in both new and existing construction?
Yes, polished concrete can be installed in both new construction projects and existing buildings. The polishing process is adaptable and can be applied to freshly poured concrete slabs as well as older, established concrete floors. This versatility makes polished concrete a popular choice for a wide range of commercial, industrial, and residential applications.
What factors determine the desired level of concrete polish?
The desired level of concrete polish is influenced by several key factors, including the intended use of the space, the anticipated traffic levels, and the overall aesthetic preferences. For areas that will see heavy foot traffic or the movement of equipment, a higher level of polish providing increased abrasion resistance may be warranted. Conversely, in spaces where a more muted, natural concrete look is preferred, a lower-sheen finish may be the optimal choice.
Factors such as lighting conditions and the desired visual effect also play a role in determining the ideal degree of concrete polishing, whether that be a matte, satin, or high-gloss final appearance. Ultimately, the polishing process is tailored to meet the specific functional and design requirements of each project.
How does sealing the polished concrete help protect the finish?
Sealing the polished concrete floor helps protect the finish in several important ways. Applying a penetrating sealer or finish coat locks in the polished sheen and gloss, helping to maintain the desired aesthetic over time. Additionally, the sealer creates a protective barrier that safeguards the concrete from stains, abrasion, and general wear and tear. This enhances the long-term durability of the polished surface, preventing it from becoming dull or damaged prematurely. The sealer also helps repel liquids, making the floor easier to clean and maintain.
How long does the concrete polishing process typically take?
The full concrete polishing process can last from a few days to several weeks, depending on the specific project requirements. The total timeline is influenced by factors such as the total square footage of the concrete surface area being treated, the degree of polish that is specified, and the condition of the existing concrete slab.
For smaller spaces where a more modest level of polish is desired, an experienced crew may complete the process in as little as 3-5 days. However, for larger commercial or industrial facilities aiming for a high-gloss, mirror-like finish, the complete grinding, honing, and polishing sequence can take 2-3 weeks or more to ensure a superior result.
Furthermore, any necessary preparatory work on the concrete surface, such as repairing cracks or unevenness, can add extra time to the overall project timeline. While the exact duration can vary, professional concrete polishing teams are well-equipped to efficiently complete the full process within a reasonable timeframe to deliver the client’s desired outcome.


